 Save
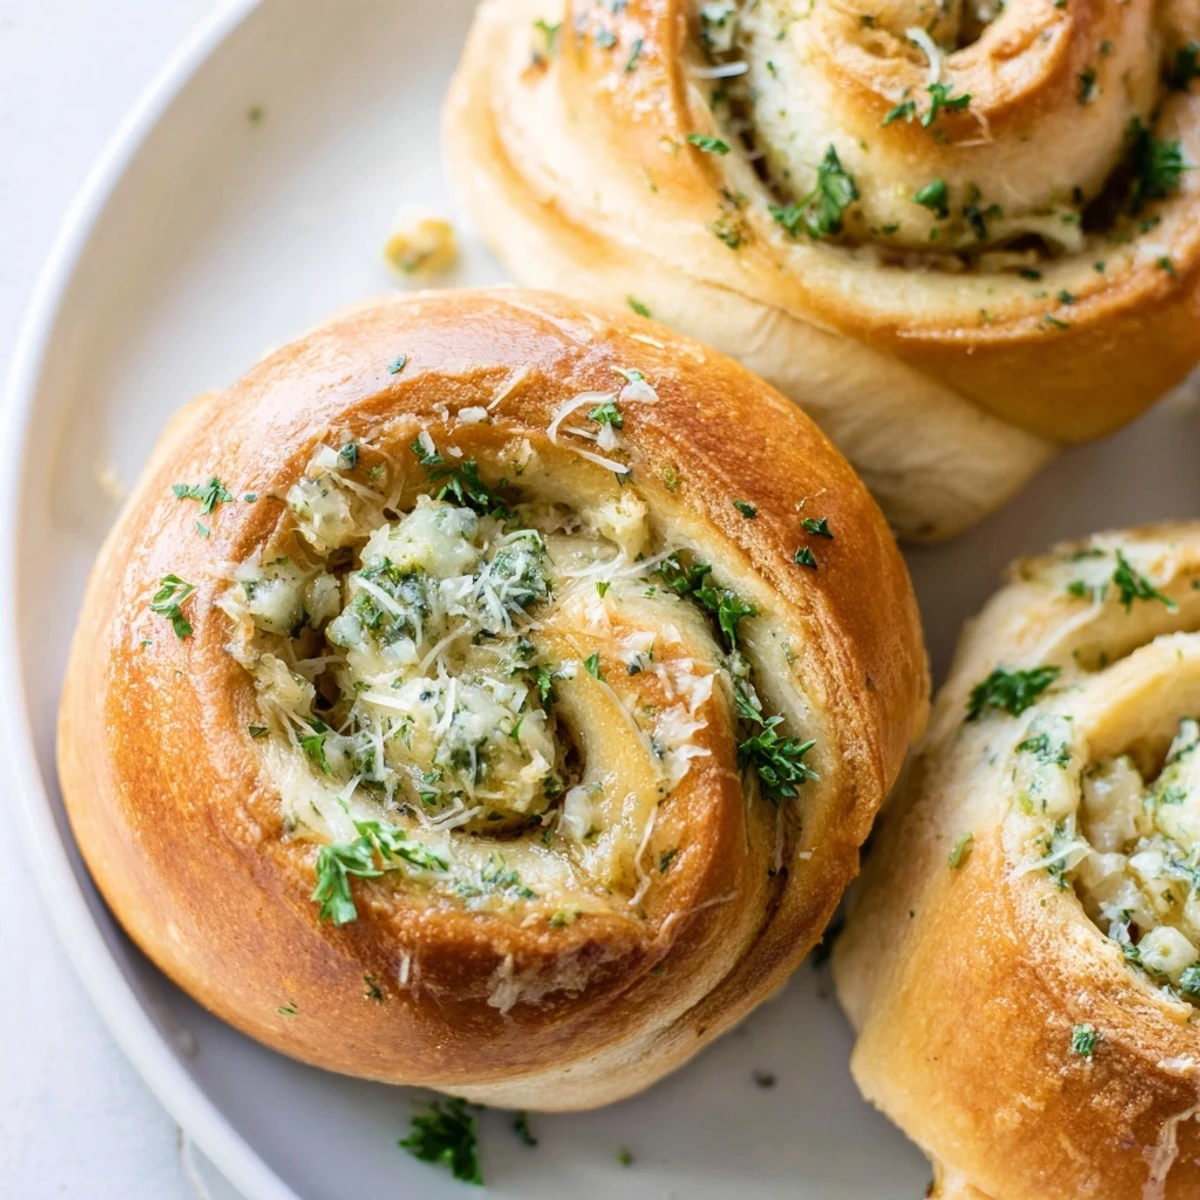
Save Create bakery-style garlic bread rolls at home with this straightforward method. These soft, fluffy pillows of dough get their incredible flavor from a rich garlic butter filling featuring fresh parsley and Parmesan. The dough comes together quickly and requires just one rise before being shaped, filled, and baked to golden perfection. Serve them warm alongside pasta, soups, or enjoy them on their own as a satisfying snack.
Theres something magical about the smell of garlic bread wafting through the house, especially when its wrapped in soft, pillowy dough. My sister stumbled upon this recipe during a chaotic weeknight dinner attempt and somehow these golden rolls became the star of the show.
Last Thanksgiving, I made three batches because the first two disappeared before dinner even started. My cousin now requests them for every family gathering, and honestly, I dont mind the excuse to bake them more often.
Ingredients
- All-purpose flour: Creates the perfect structure for soft rolls that still hold their shape
- Active dry yeast: The rising agent that gives these rolls their signature fluffiness
- Warm milk: Activates the yeast and adds tenderness to the crumb
- Sugar: Feeds the yeast and helps the dough develop a beautiful golden color
- Salt: Essential for flavor and controlling yeast growth
- Melted butter: Adds richness and keeps the dough tender
- Egg: Provides structure and helps the rolls brown beautifully
- Softened butter: Creates that luscious garlic spread that gets swirled inside
- Fresh garlic: The star of the showuse fresh for the best aroma
- Fresh parsley: Brightens the butter filling and adds a pop of color
- Grated Parmesan: Adds a savory depth that makes these irresistible
Instructions
- Wake up the yeast:
- Dissolve sugar in warm milk, sprinkle yeast on top, and wait for it to foam up like a mini science experiment
- Bring the dough together:
- Whisk flour and salt in a large bowl, then pour in the melted butter, egg, and that bubbly yeast mixture until everything comes into a shaggy dough
- Knead with purpose:
- Turn onto a floured surface and knead for 8 to 10 minutes until the dough fights back like a friendly pillow
- Let it rise:
- Place in a greased bowl, cover with a warm towel, and find a cozy spot for it to double in size
- Make the magic filling:
- While dough rises, mix softened butter with minced garlic, parsley, salt, and Parmesan until its spreadable perfection
- Shape your rolls:
- Punch down the dough, divide into 12 pieces, flatten each into a rectangle, spread with garlic butter, then roll tight and pinch shut
- Second rise:
- Arrange seam-side down in your baking pan, cover, and let them puff up for another 20 to 30 minutes
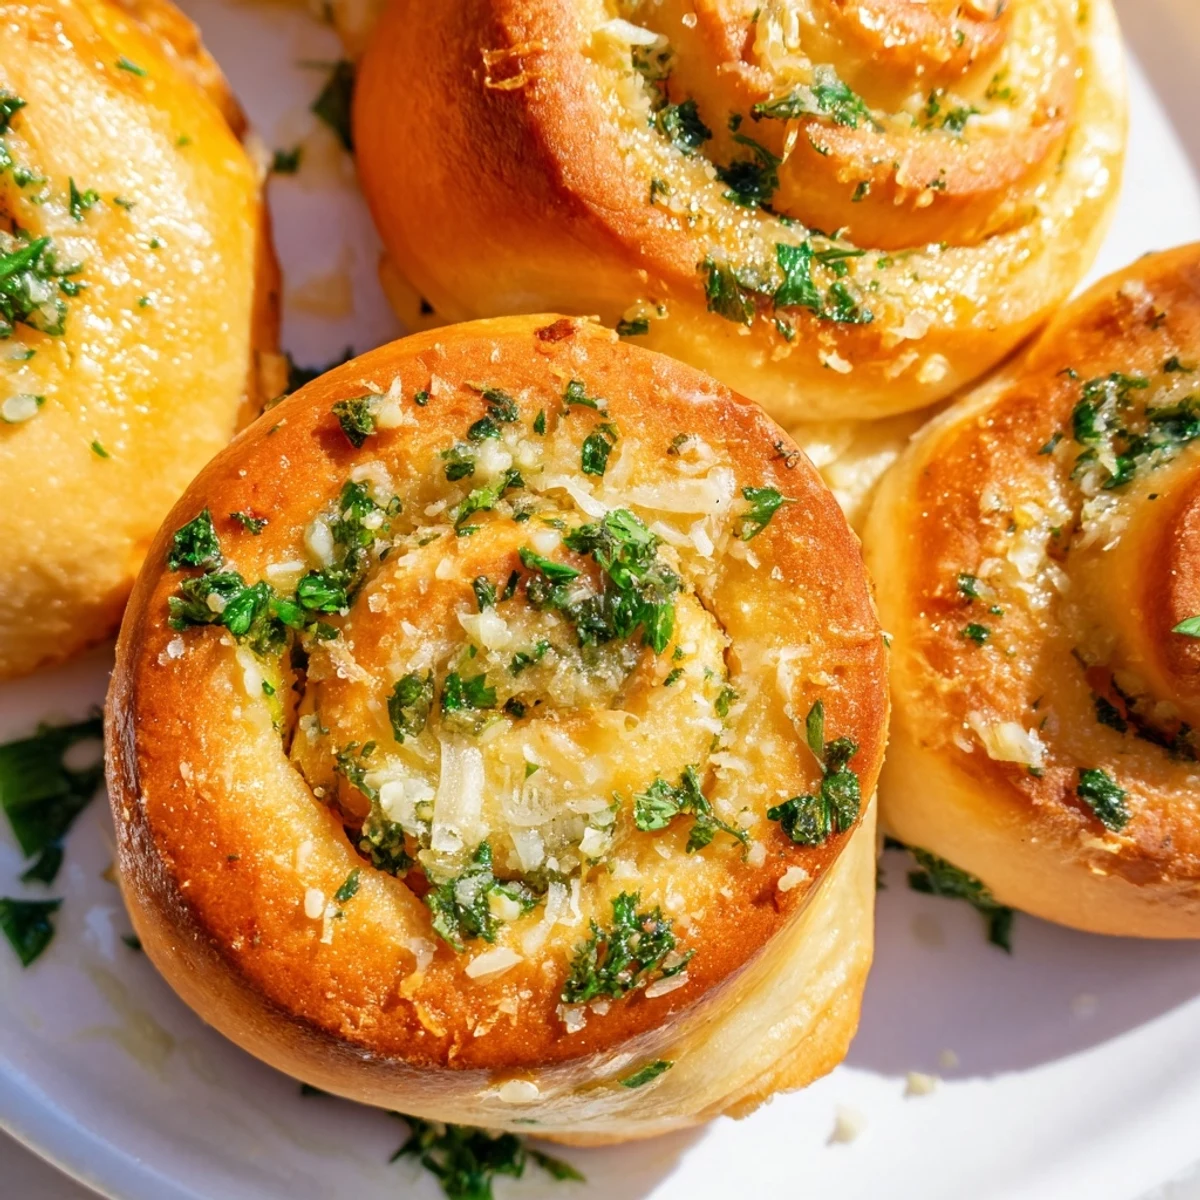
- Get them golden:
- Brush with melted butter, shower with parsley and cheese, then bake at 350°F for 20 to 25 minutes until theyre gorgeously browned
 Save
Save These rolls have a way of bringing people to the kitchen. Theres something about tearing into warm, garlic-infused bread that makes conversations flow easier and linger longer.
Making Them Ahead
You can prepare the garlic butter filling up to three days in advance and keep it refrigerated. The dough can also be made through the first rise, then refrigerated overnight for a slow fermentation that develops even more flavor.
Freezing Instructions
Bake the rolls completely, let them cool, then freeze in an airtight bag for up to three months. Reheat in a 350°F oven for about 10 minutes and they taste freshly baked.
Serving Suggestions
These rolls pair beautifully with soups, salads, or as a side to pasta dishes. They also make excellent sandwich sliders for parties.
- Brush with extra butter right after baking for maximum shine
- Try adding mozzarella to the filling for extra cheesy goodness
- Keep them covered while cooling to stay soft
 Save
Save Nothing beats pulling these fresh from the oven and watching everyone reach for one.
Your Recipe Questions Answered
- → How do I know when the dough has risen enough?
-
The dough is properly risen when it has doubled in size. A simple test is to gently press two fingers into the dough about 1/2 inch deep—if the indentation remains, the dough is ready. This usually takes about 1 hour in a warm, draft-free spot.
- → Can I prepare these rolls ahead of time?
-
Yes! Prepare the rolls through step 6, cover tightly with plastic wrap, and refrigerate overnight. Let them sit at room temperature for 30 minutes before baking as directed. You can also freeze baked rolls for up to 3 months and reheat in the oven.
- → What's the best way to store leftover rolls?
-
Store cooled rolls in an airtight container or resealable bag at room temperature for up to 2 days. For longer storage, freeze them in a freezer bag. To refresh, wrap in foil and warm in a 350°F oven for 10 minutes.
- → Can I use dried parsley instead of fresh?
-
Fresh parsley provides the best flavor and color, but you can substitute 1 teaspoon dried parsley flakes for the fresh herbs. Rehydrate the dried parsley in a small amount of warm water before adding to the butter mixture.
- → Why did my rolls turn out dense?
-
Dense rolls usually result from not kneading the dough enough to develop gluten, or not allowing sufficient rising time. Ensure you knead for the full 8-10 minutes until the dough feels smooth and elastic. Also, make sure your yeast is fresh and the milk was warm but not hot.
- → Can I make these dairy-free?
-
Substitute the butter with vegan butter or margarine, and use plant-based milk such as almond or soy milk. For the Parmesan, use a vegan cheese alternative or nutritional yeast. The texture and rising ability should remain similar.
