 Save
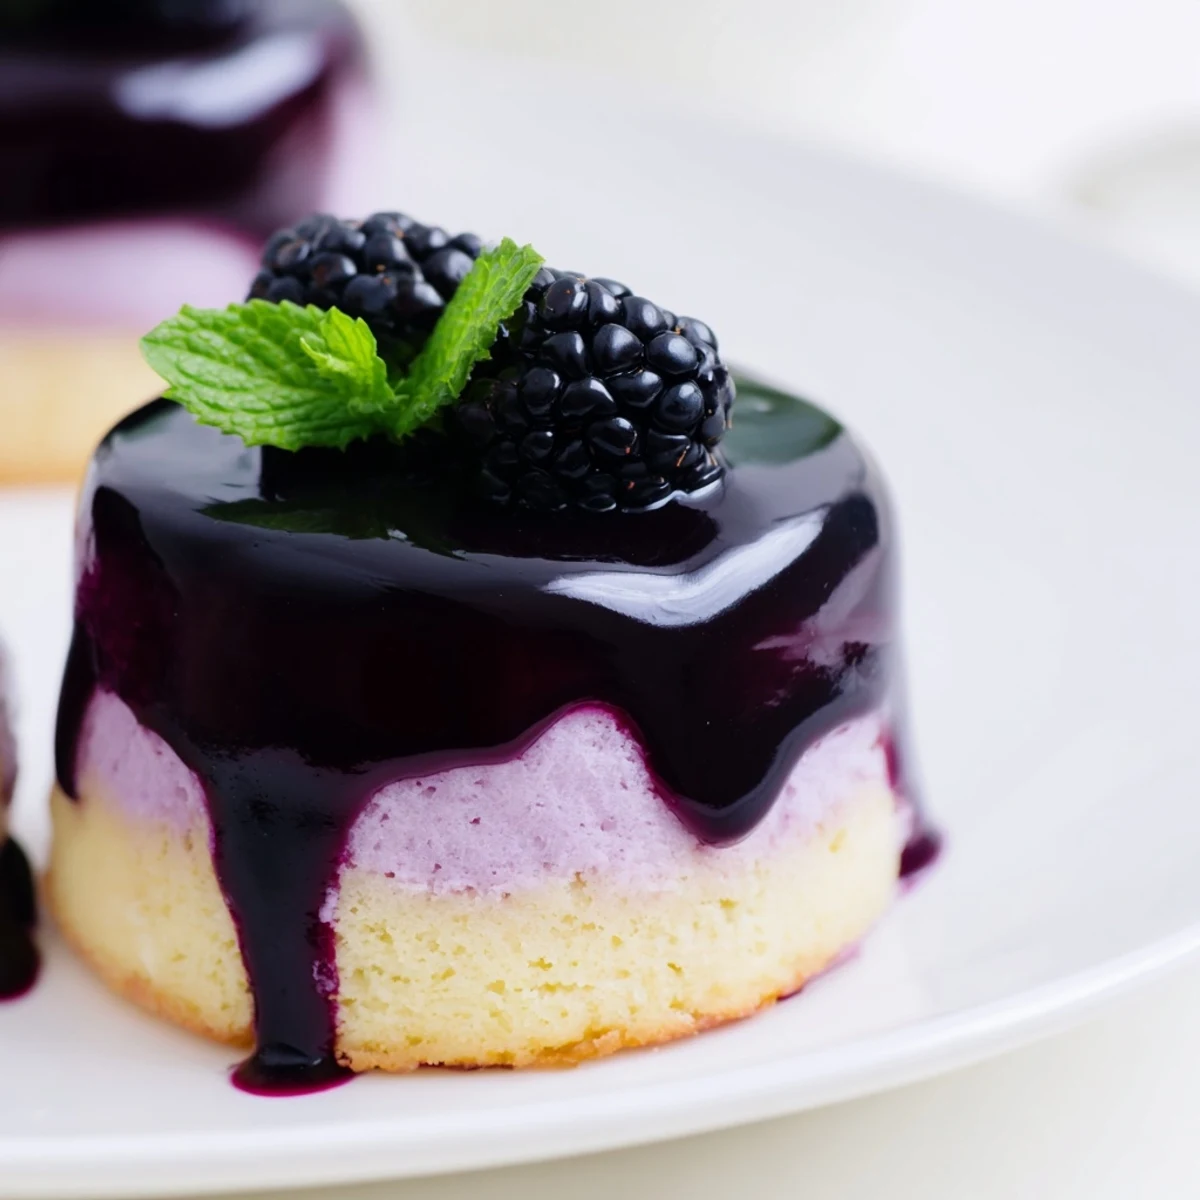
Save These elegant individual desserts combine a tender vanilla sponge base with a light, airy blackberry mousse that's naturally fruity and delicately sweet. The glossy blackberry glaze adds a professional finish while enhancing the berry flavor. Though they require chilling time to set properly, these mini cakes are entirely worth the wait and can be prepared ahead for gatherings.
The mousse achieves its silky texture through freshly whipped heavy cream folded into strained blackberry puree, while the sponge provides a stable foundation. Fresh blackberries bring vibrant purple color and tart sweetness that balances perfectly with the creamy mousse layer.
The afternoon sunlight caught the deep purple glaze just right, making these tiny cakes look like jewels resting on my grandmother's crystal serving tray. I'd spent the entire day obsessing over whether the mousse would set properly, testing and retesting until my kitchen smelled like warm berries and vanilla. When my friends finally took that first bite, their eyes closed in that way that tells you everything worked out exactly as it should.
Last summer I made these for a garden party that nearly got rained out. We ended up crowded around my dining table, candles flickering against the storm clouds outside, serving these delicate desserts on mismatched china plates. Something about the bright berry flavor against the moody weather made the evening feel unexpectedly special.
Ingredients
- 2 large eggs: Room temperature eggs will whip up much higher and create a lighter sponge base
- 60 g granulated sugar: This amount sweetens the sponge perfectly without overpowering the delicate mousse
- 60 g all purpose flour: Sift it first to prevent any lumps in your tender cake layer
- 1/4 tsp vanilla extract: Pure vanilla adds a warm background note that complements the tart berries
- Pinch of salt: Just enough to enhance the other flavors without making anything taste salty
- 300 g fresh or frozen blackberries: Frozen work beautifully here, just thaw them completely before cooking
- 80 g granulated sugar: Balances the natural tartness of the blackberries perfectly
- 2 tbsp lemon juice: Brightens the berry flavor and helps the gorgeous purple color really pop
- 6 g (2 sheets) powdered gelatin or leaf gelatin: This gives the mousse structure while keeping it silky smooth
- 250 ml heavy cream, cold: The cream must be thoroughly chilled to whip up properly
- 100 g blackberry puree: Strain it through a fine mesh sieve for the smoothest glaze possible
- 30 g granulated sugar: Just enough sweetness to balance the puree's acidity
- 2 g (1 sheet) gelatin: Creates that professional glossy finish that sets perfectly
- Fresh blackberries: Choose plump, deeply colored berries for the prettiest garnish
- Edible flowers or mint leaves: A tiny mint leaf or pansy adds such an elegant finishing touch
Instructions
- Prepare the sponge foundation:
- Preheat your oven to 350°F (175°C) and line a 9x13-inch baking sheet with parchment paper. Beat the eggs and sugar until pale and thick, gently fold in the flour, vanilla and salt. Spread the batter evenly and bake for 10 to 12 minutes until lightly golden and springy to the touch.
- Cut and place the sponge rounds:
- Let the sponge cool completely before cutting out 8 circles using a 2.5-inch round cookie cutter. Place each circle at the bottom of individual silicone molds or lined muffin tins, pressing gently to ensure they sit flat.
- Prepare the blackberry puree:
- Soften the gelatin in cold water for 5 minutes if using sheets, or bloom powdered gelatin according to package directions. Simmer blackberries, sugar and lemon juice over medium heat until berries are soft, then puree and strain through a fine sieve to remove seeds.
- Create the mousse base:
- While the puree is still warm, stir in the softened gelatin until completely dissolved. Let the mixture cool to room temperature, then whip the cold heavy cream to soft peaks and gently fold in the cooled blackberry puree until smooth.
- Fill and chill the cakes:
- Spoon or pipe the mousse over each sponge base in the molds, smoothing the tops with an offset spatula. Chill in the refrigerator for at least 4 hours or until completely set and firm to the touch.
- Make the glossy glaze:
- Bloom the gelatin as you did before, then gently heat the blackberry puree and sugar until the sugar dissolves and the mixture is warm. Stir in the gelatin until dissolved, then let the glaze cool until slightly thickened but still pourable.
- Glaze and garnish:
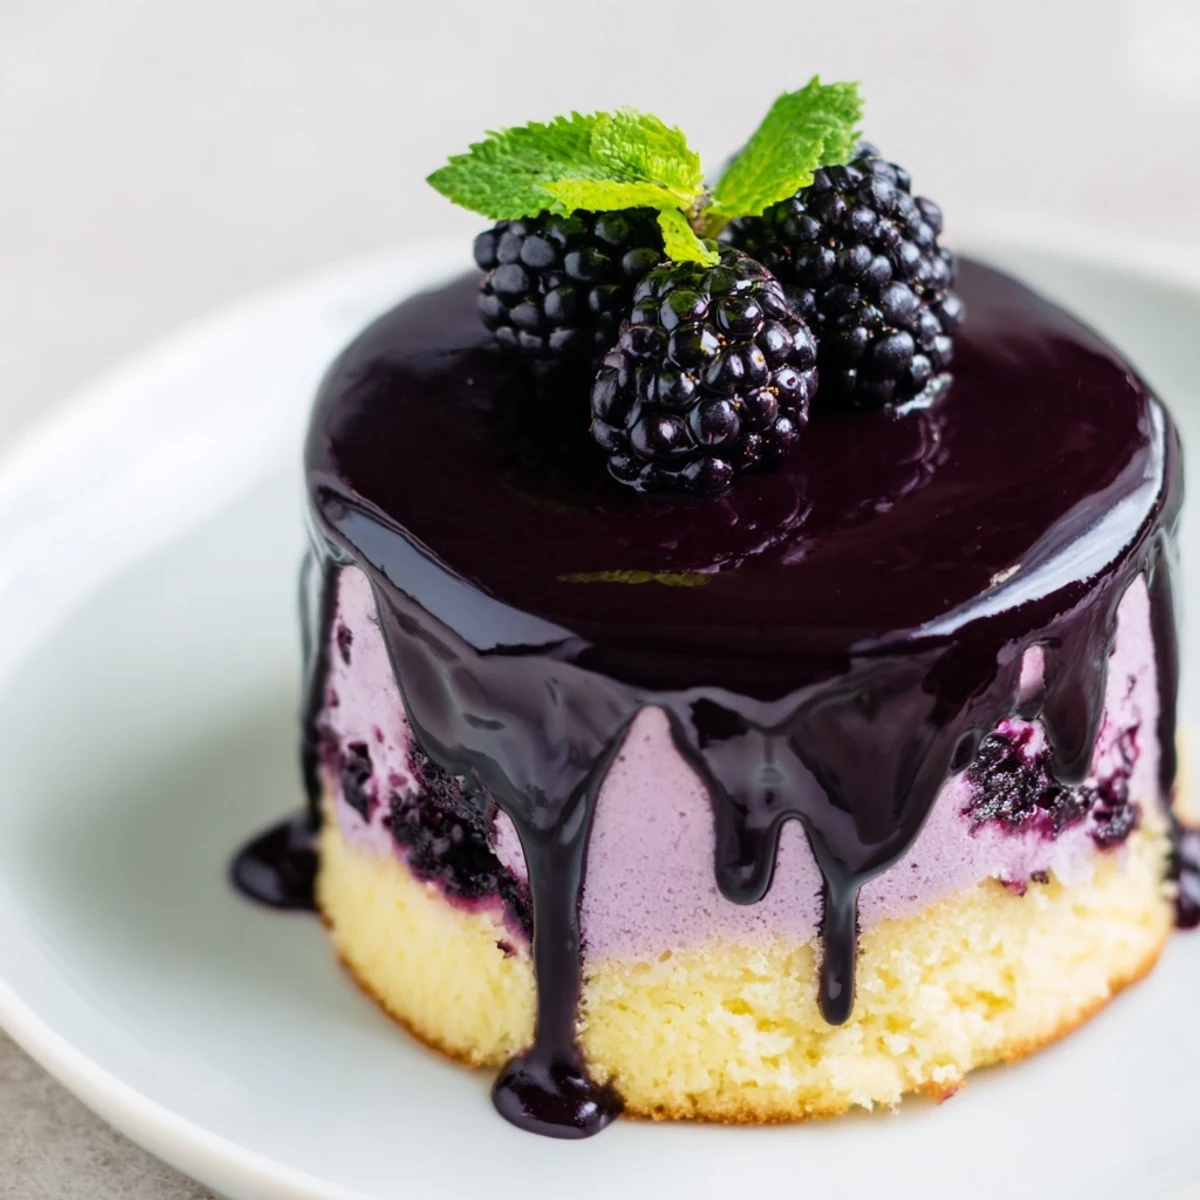
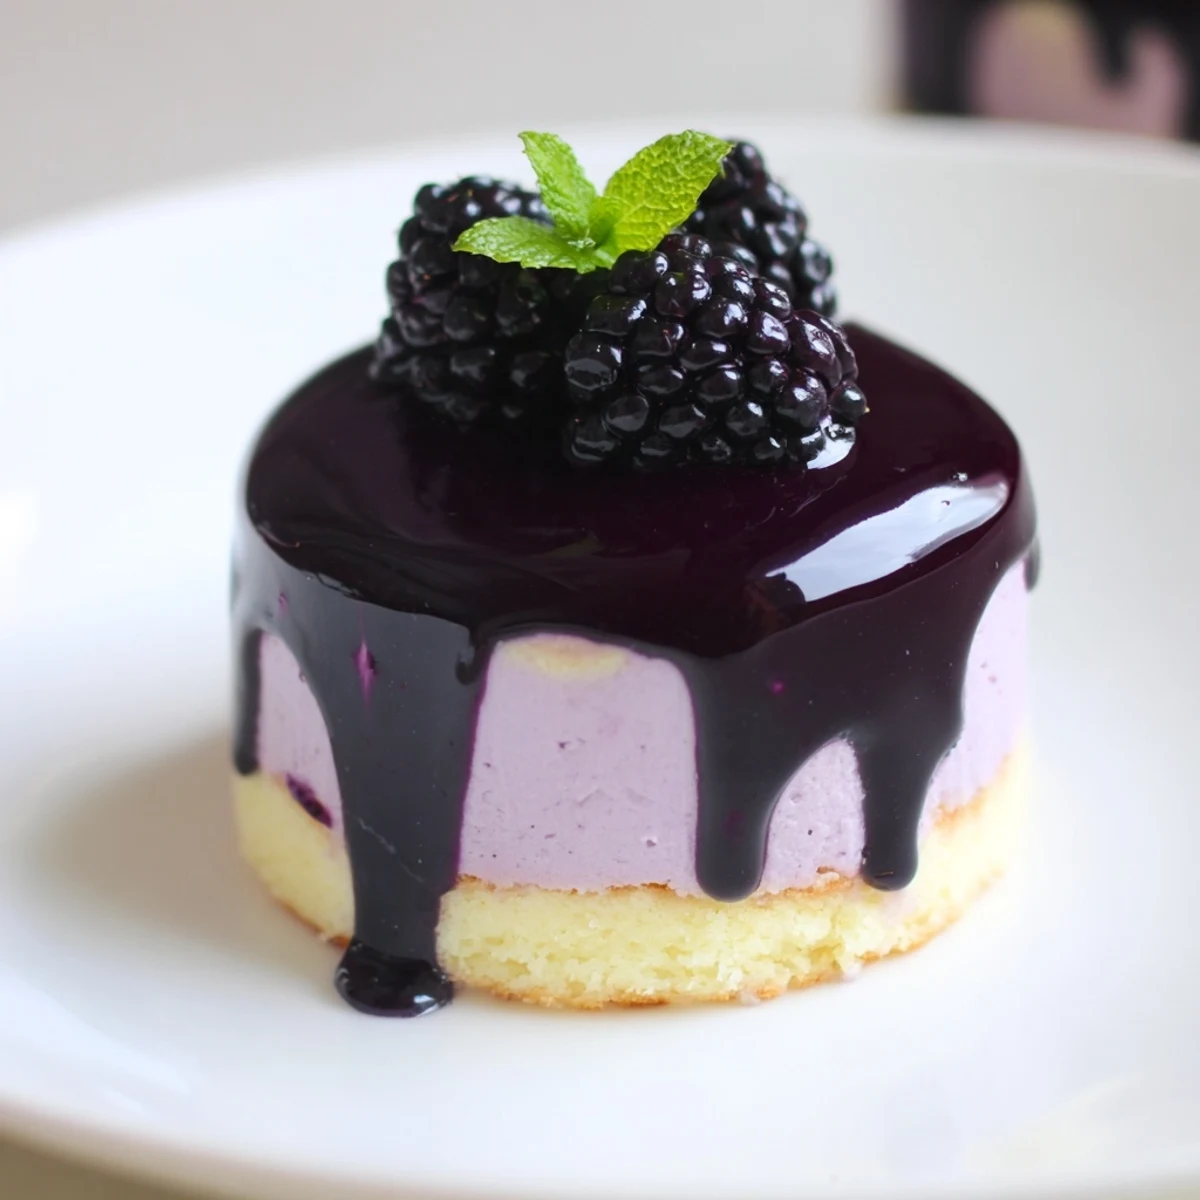
- Unmold the chilled mousse cakes and place them on a wire rack over a tray. Pour the glaze over the tops, allowing it to drip down the sides, then chill briefly to set. Top with fresh blackberries and edible flowers or mint if desired.
 Save
Save My sister requested these for her wedding shower after seeing a photo I'd posted on social media. I made them the day before and stored them carefully, watching her face light up when she saw the tray of perfectly domed purple desserts waiting for her guests.
Working with Gelatin
I used to be intimidated by gelatin until a chef friend taught me that the key is patience. Let it bloom fully in cold water, dissolve it completely in warm liquid, and never rush the cooling process. Taking your time at each step results in that professional texture and finish that makes these cakes so special.
Mastering the Sponge Base
The sponge layer needs to be tender but sturdy enough to support the mousse without getting soggy. I learned to underbake slightly rather than overbake, pulling it from the oven when just set and golden. A slightly moist sponge creates a beautiful textural contrast with the airy mousse above it.
Getting that Perfect Glaze
The glaze consistency took me several attempts to perfect, thick enough to coat beautifully but thin enough to pour smoothly. Working quickly once it reaches the right temperature gives that mirror like finish that catches the light so beautifully. Set up your wire rack and tray before you start so everything is ready when the glaze is.
- Pour the glaze from slightly above the cakes for even coverage
- Let any excess glaze drip off for about 30 seconds before transferring
- Use a small offset spatula to clean up any drips on the serving plate
 Save
Save There's something deeply satisfying about serving a dessert that looks so elegant yet comes from such simple ingredients. Watch how quickly these disappear, and save the recipe for every special occasion that follows.
Your Recipe Questions Answered
- → Can I make these mousse cakes ahead of time?
-
Yes, these mini cakes are excellent for advance preparation. The assembled mousse cakes can be refrigerated for up to 2 days before adding the glaze. Once glazed and set, they'll keep for another day. For optimal texture, add the final fresh blackberry garnish just before serving.
- → Can I substitute other berries for blackberries?
-
Absolutely. Raspberries, blueberries, or mixed berries work beautifully in this dessert. Keep in mind that raspberries are more tart and may require slightly more sugar, while blueberries have a milder flavor. Adjust sweetness to taste when preparing the puree.
- → What if I don't have individual silicone molds?
-
You can use lined muffin tins, small ramekins, or even a larger cake pan and slice into portions. Silicone molds make unmolding easiest, but careful tapping and gentle warmth should release the cakes from other containers. Parchment liners in muffin tins work particularly well.
- → Can I use agar agar instead of gelatin?
-
Yes, agar agar is a suitable vegetarian alternative. Use approximately 1 teaspoon of agar agar powder for each gelatin sheet called for. Note that the texture may be slightly firmer, and the setting time might differ slightly. Always dissolve agar agar in boiling liquid before incorporating.
- → Why must I strain the blackberry puree?
-
Straining removes the seeds and pulp, ensuring a perfectly smooth, velvety mousse and glaze texture. The tiny blackberry seeds can interrupt the delicate mouthfeel of these elegant mini cakes. A fine-mesh sieve works best, pressing the puree through with the back of a spoon to extract maximum flavor.
- → How do I know when the mousse is properly set?
-
The mousse should hold its shape when gently touched and no longer jiggle like liquid when the mold is tapped. This typically takes 4 hours in the refrigerator. For the glaze, it's ready when it coats the back of a spoon and has cooled to slightly thickened but still pourable consistency.
