 Save
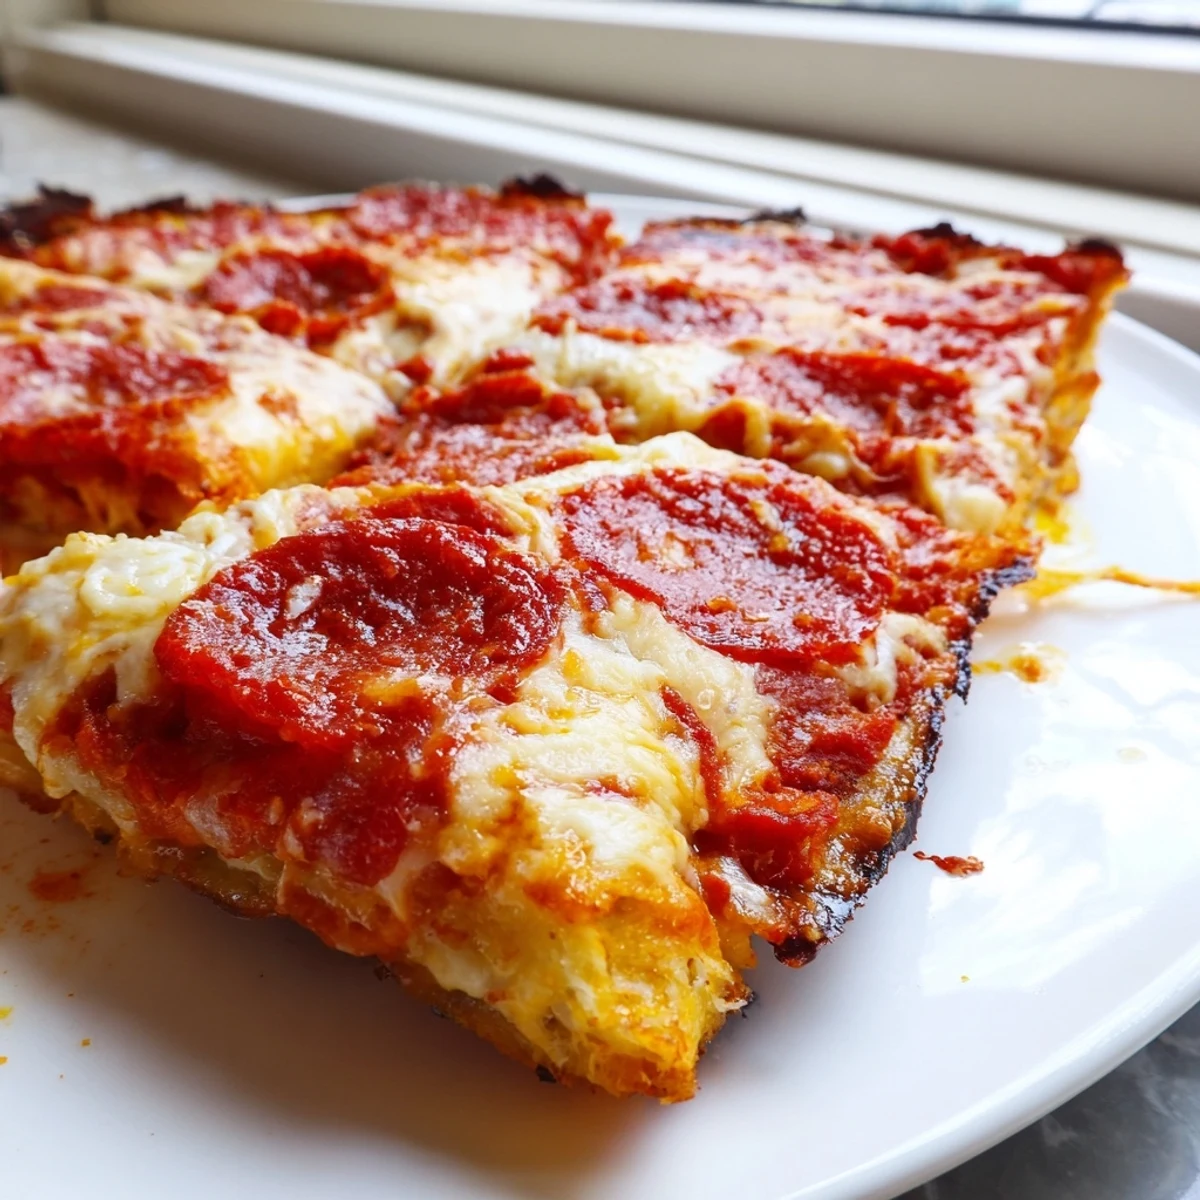
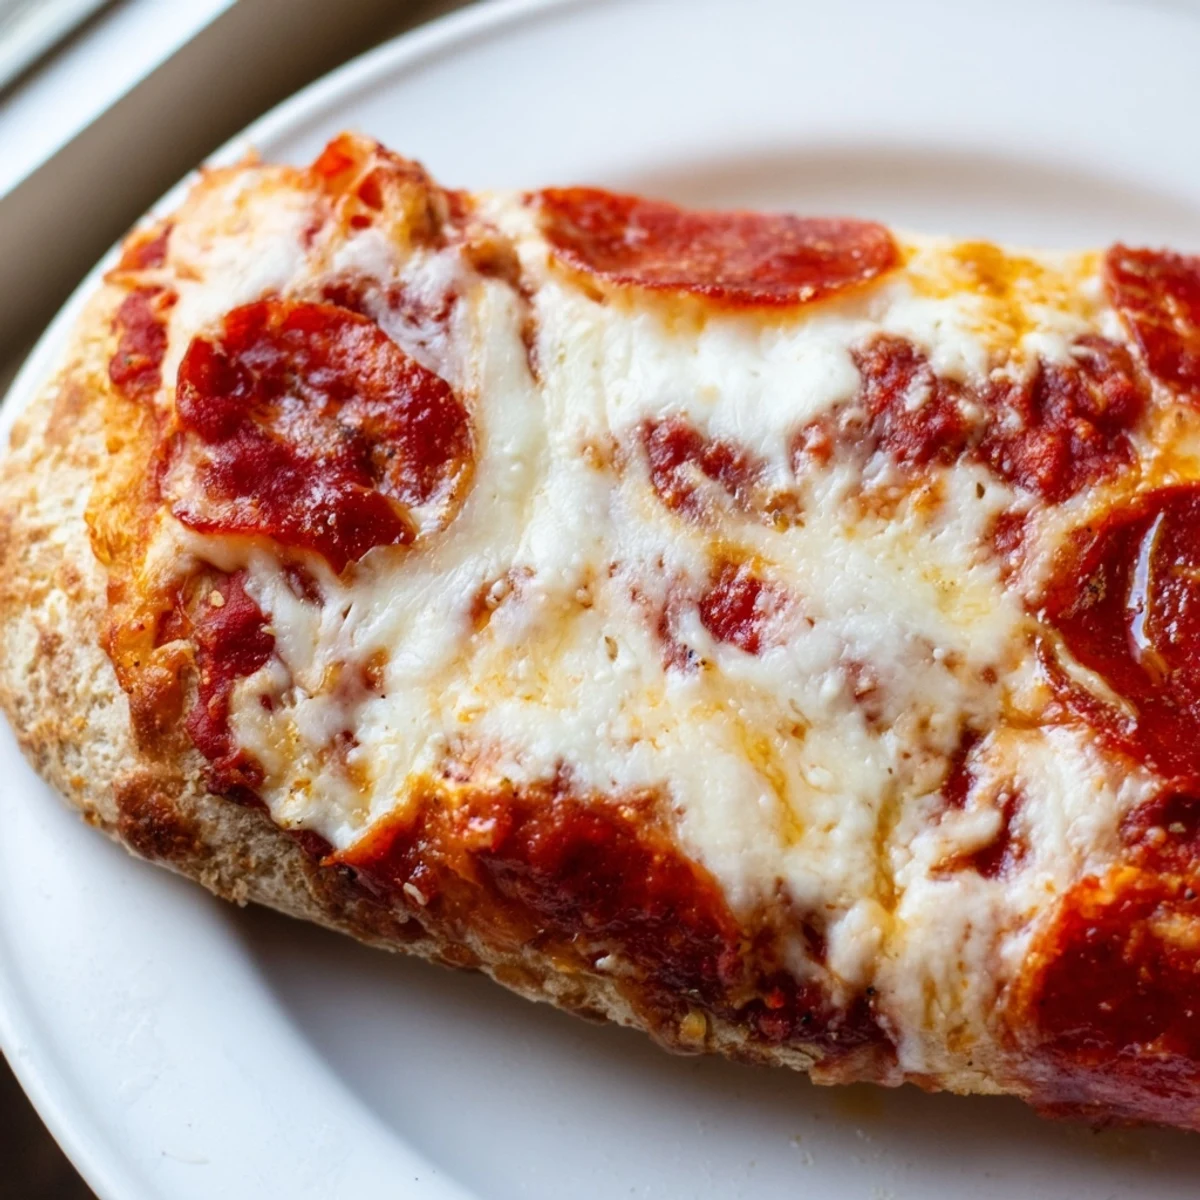
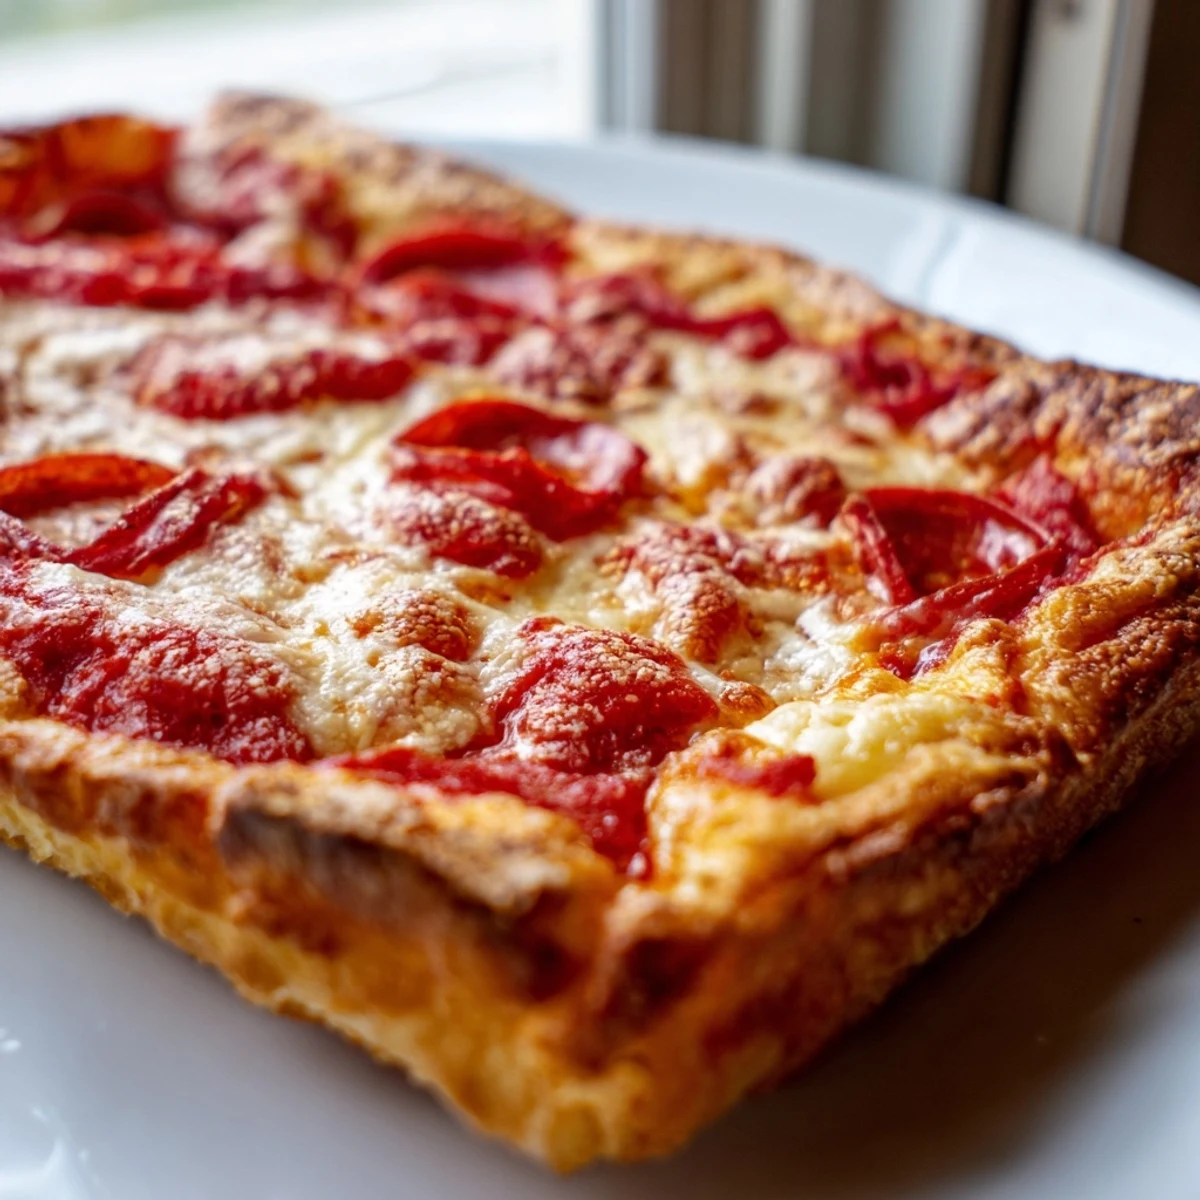
Save Master the art of creating a golden, thick and crispy pan pizza with a soft yet chewy interior and perfectly melted cheese topping. This homemade version captures the essence of the iconic Pizza Hut classic with its signature thick crust, fluffy inside, and crispy edges.
The dough requires just 25 minutes of active preparation, then rises for an hour while you prepare a simple seasoned tomato sauce. Press the dough into well-greased cake pans to achieve that authentic pan-fried bottom and raised edges. Top with shredded mozzarella and your favorite toppings, then bake at high heat until the crust turns golden brown and the cheese bubbles beautifully.
The secret lies in buttering the pans generously and letting the dough rest before baking. This creates those delightfully crispy, oil-fried bottom layers that distinguish pan pizza from other styles. The entire process takes under two hours, with most time being hands-off rising.
The smell of butter hitting a hot cake pan takes me right back to Friday nights when my dad would declare it was too expensive to order out and proceeded to make something even better. I watched him press pizza dough into buttered pans with such serious concentration, as if he were conducting important scientific research rather than just making dinner. That first bite of thick, crispy crust with cheese still bubbling made me forget all about the delivery guy we definitely were not calling.
Last winter my roommate and I spent a snowy Sunday attempting to perfect this recipe after our local pizza place closed early. We made three different batches, adjusting the butter amount and oven temperature each time, until our tiny apartment smelled like a pizzeria and we had eaten more pizza than any reasonable humans should consume. That was the afternoon I learned the secret is in the patience, letting the dough rest in the pan before baking.
Ingredients
- 3 cups all-purpose flour: This creates the perfect structure for a thick, sturdy crust that can support generous toppings without getting soggy
- 2 ¼ tsp active dry yeast: Make sure your water is warm but not hot, like bathwater temperature, or you will kill the yeast before it can work its magic
- 1 ½ tsp sugar: Feeds the yeast and helps the crust achieve that beautiful golden brown color in the oven
- 1 ½ tsp salt: Do not reduce this amount because salt is what balances the sweetness and brings out all the flavors
- 1 cup warm water: The temperature really matters here, too cold and the yeast sleeps, too hot and it dies
- 2 tbsp olive oil: Keeps the dough tender and adds subtle flavor that develops during baking
- 2 tbsp unsalted butter softened: This is the secret weapon for creating that crispy, fried restaurant style bottom
- 1 cup canned tomato sauce: Use a good quality brand because the sauce flavor comes through clearly on this style of pizza
- 1 tsp dried oregano and ½ tsp dried basil: These classic Italian herbs give the sauce that familiar pizza parlor taste
- ½ tsp garlic powder and onion powder: Build layers of savory flavor without adding any chunks that might make the sauce texture uneven
- 2 cups shredded mozzarella cheese: Low moisture mozzarella works best because it melts beautifully without making the crust soggy
- 20-24 slices pepperoni or preferred toppings: Pepperoni cups up beautifully in the high heat and releases those delicious little pools of oil
- 1 tbsp olive oil for brushing crust: Gives the edges that gorgeous golden finish and subtle crunch
Instructions
- Wake up the yeast:
- Dissolve the sugar and yeast in your warm water and walk away for about 5 minutes until you see a layer of foam on top, which tells you the yeast is alive and ready to work.
- Build the dough foundation:
- Mix the flour and salt in a large bowl, then pour in your yeast mixture along with the olive oil, stirring until you have a rough, shaggy dough that comes together in a ball.
- Knead until smooth:
- Turn the dough onto a floured surface and knead for 7 to 8 minutes, pushing the dough away with your heel and folding it back toward you, until it feels smooth and elastic like a soft earlobe.
- Let it rise:
- Place the dough in a lightly oiled bowl, cover it with a warm towel, and find a cozy spot for it to double in size, which usually takes about an hour.
- Prepare the pans:
- Generously grease two 9 inch round cake pans with softened butter, then brush the bottom with a little olive oil, because this double layer creates that signature crispy fried bottom.
- Shape the crusts:
- Punch down the risen dough, divide it in half, and press each portion into the prepared pans, pushing the dough up the sides slightly to create a thick edge for the crust.
- Rest before baking:
- Cover the pans and let the dough relax for 10 to 15 minutes, which prevents the crust from shrinking in the oven and helps it achieve that perfect thick, chewy texture.
- Get the oven ready:
- Preheat your oven to 450°F because the high temperature is essential for creating that crispy bottom and bubbly cheese top.
- Mix the sauce:
- Combine the tomato sauce with oregano, basil, garlic powder, onion powder, sugar, and salt and pepper in a small bowl, then spread half the sauce on each crust.
- Add the toppings:
- Sprinkle the cheese evenly over the sauce, arrange your pepperoni or other toppings on top, and brush the exposed crust edges with olive oil for that beautiful golden finish.
- Bake to perfection:
- Bake for 20 to 25 minutes until the crust is deep golden brown, the cheese is bubbling and has started to brown in spots, and your kitchen smells amazing.
- Let it rest briefly:
- Cool the pizzas for just a few minutes before slicing, which gives the cheese time to set slightly so it does not slide off when you cut into the pies.
 Save
Save This recipe became my go to for new neighbors, nervous first dates, and cheering up heartbroken friends because there is something universally comforting about hot pan pizza fresh from the oven. I have made it in tiny city apartments and suburban kitchens alike, and the result is always the same: happy people and empty plates.
Pan Selection Secrets
Cast iron skillets work beautifully for this recipe if you want an even crispier crust, but good old cake pans give you that authentic Pizza Hut texture. Dark metal pans conduct heat better than light colored ones, so you will get a more golden, evenly cooked bottom.
Make Ahead Magic
You can make the dough the night before and let it rise slowly in the refrigerator, which actually develops more flavor and gives you a head start on dinner. Just bring it to room temperature for about 30 minutes before you press it into the pans.
Perfect Pairings
A cold crisp lager cuts through the rich cheese and buttery crust, while a simple green salad with bright vinaigrette balances the heaviness of the pizza. For dessert, keep it light with fresh fruit or just enjoy another slice cold for breakfast the next morning.
- Garlic knots or breadsticks make this a full meal deal situation
- Keep red pepper flakes and grated parmesan on the table for people to customize their slices
- This pizza reheats surprisingly well in a skillet over medium heat
 Save
Save There is something deeply satisfying about pulling a homemade pan pizza out of the oven, the cheese still bubbling and the crust impossibly golden. Your house will smell better than any pizzeria, and you will have created something that brings people together around the table.
Your Recipe Questions Answered
- → What makes pan pizza different from regular pizza?
-
Pan pizza features a thick, fluffy crust with a crispy, fried bottom achieved by baking in an oiled pan. The dough rises more during baking, creating a breadier texture and thicker base compared to thin crust styles.
- → Can I let the dough rise overnight?
-
Absolutely. For deeper flavor development, let the dough rise slowly in the refrigerator overnight. The cold fermentation enhances the taste profile and creates a more complex, professional-quality crust.
- → Why use cake pans instead of pizza pans?
-
Cake pans with taller sides help create the characteristic thick, raised edges of pan pizza. The straight sides also promote even rising and a uniform thickness throughout the base, mimicking the iconic structure.
- → How do I get the crispiest bottom crust?
-
Generously butter and oil your pans before pressing in the dough. The fat creates a fried effect on the bottom during baking. Also, preheating the pans slightly can help achieve extra crispiness.
- → What other toppings work well with this style?
-
Beyond pepperoni, try mushrooms, bell peppers, onions, sausage, bacon, or olives. The thick crust supports substantial toppings. Just avoid overloading, which can prevent the dough from cooking through properly.
- → Can I freeze the dough for later use?
-
Yes, after the first rise, punch down the dough, wrap tightly in plastic, and freeze for up to 3 months. Thaw overnight in the refrigerator, then let come to room temperature before shaping and baking.
