 Save
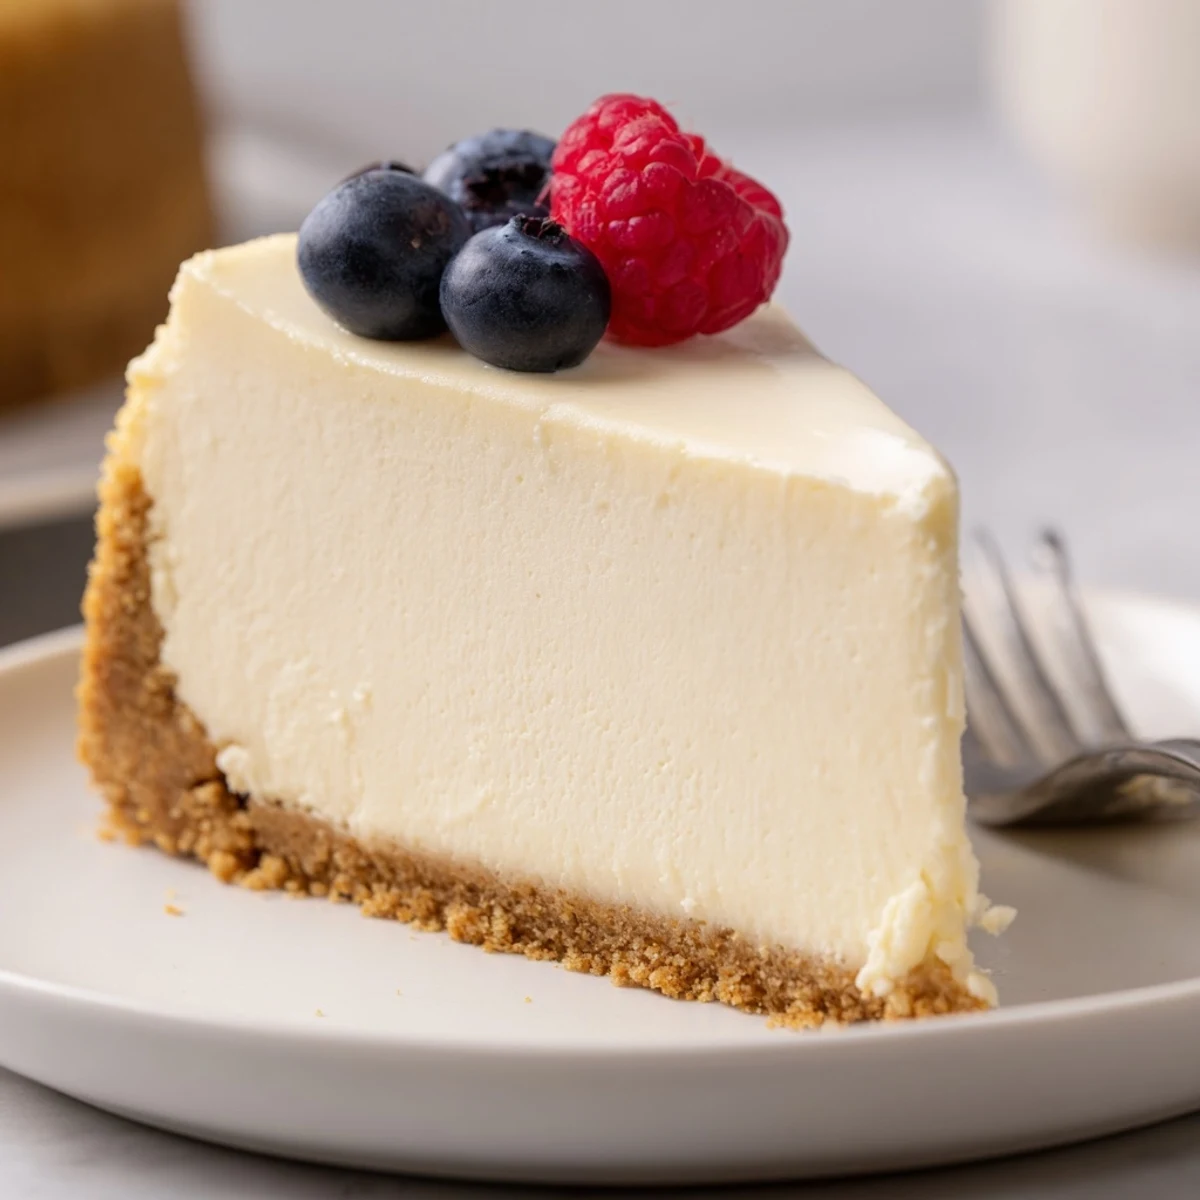
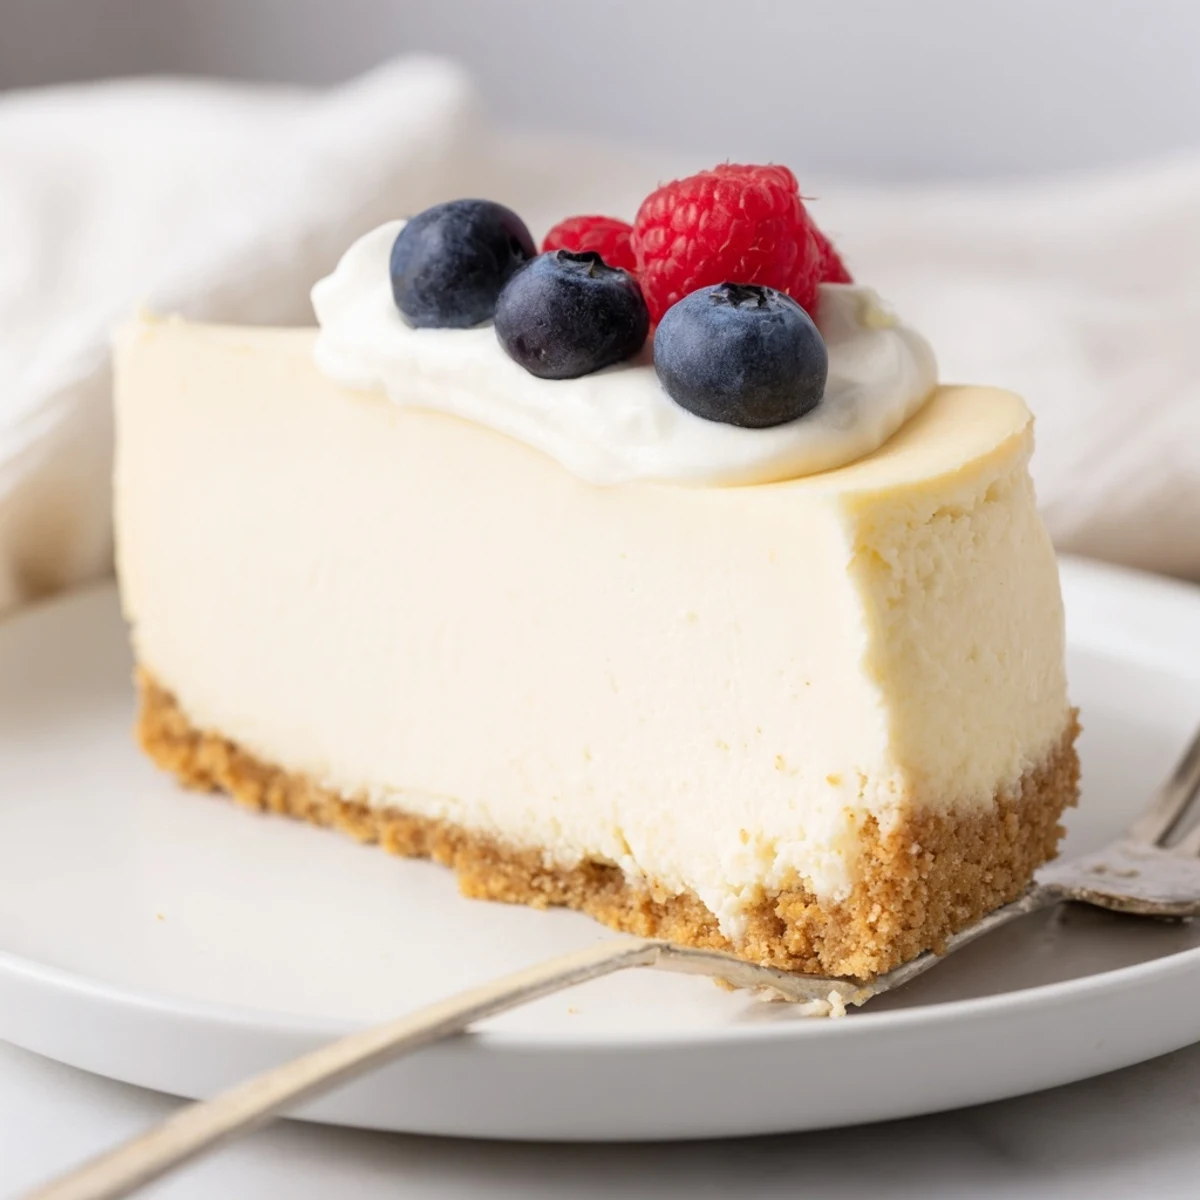
Save This classic American baked cheesecake features a buttery graham cracker crust pressed into a springform pan, filled with a silky cream cheese mixture enriched with sour cream, vanilla, and a hint of lemon zest.
The secret to a crack-free finish lies in baking low and slow at 160°C, then letting it cool gently inside the oven with the door cracked. After a minimum six-hour chill in the refrigerator, the cheesecake sets into a dense, creamy slice of perfection.
Top with a sweetened sour cream layer, fresh berries, fruit compote, or chocolate sauce for an elegant dessert that serves twelve and is well worth the wait.
The oven door had a stubborn squeak that particular winter afternoon, and every time I opened it to check on my cheesecake, the sound echoed through my tiny apartment like a small complaint. I had invited three friends over for dinner, and dessert was going to be the grand finale if I could stop second guessing every step. The filling looked silky and hopeful in the bowl, and I remember thinking that cream cheese might be the most forgiving ingredient in my refrigerator. That night, the cheesecake emerged with barely a crack, and my friends went quiet after the first bite in the best possible way.
Serving this at a summer potluck changed how I thought about toppings entirely. Someone brought fresh strawberries and another friend showed up with a jar of hot fudge, and we ended up building a full topping bar on the kitchen counter. The cheesecake disappeared in under twenty minutes, and I found myself writing the recipe on a napkin for someone before the night was over.
Ingredients
- Graham crackers or digestive biscuits (200 g): The backbone of your crust, so pick a brand you actually enjoy eating plain because that flavor will anchor every bite.
- Unsalted butter, melted (100 g): Binds the crumbs together and adds richness, and using unsalted lets you control the final salt level.
- Sugar for crust (2 tbsp): A small amount that rounds out the slight bitterness of toasted crumbs.
- Cream cheese, softened (900 g): The star of the show, so bring it to room temperature for at least an hour or you will fight lumps the entire time.
- Granulated sugar (200 g): Sweetens without masking the tang that makes cheesecake taste like cheesecake.
- Large eggs (4): Added one at a time to keep the batter smooth and prevent incorporating too much air, which causes cracks.
- Sour cream (200 ml for filling): Adds moisture and a gentle tang that balances the richness beautifully.
- All-purpose flour (40 g): A tiny stabilizer that helps prevent the dreaded crack down the middle.
- Vanilla extract (2 tsp): Use the real stuff here because artificial vanilla will announce itself in a baked cheesecake and not in a good way.
- Lemon zest (from 1 lemon, optional): A bright whisper of citrus that lifts the whole flavor profile and makes people ask what your secret is.
- Sour cream for topping (250 g): Creates a traditional blanket over the top that hides any imperfections with elegance.
- Powdered sugar (2 tbsp): Sweetens the topping without any graininess.
- Vanilla extract for topping (1 tsp): Ties the topping flavor back to the filling.
Instructions
- Build the foundation:
- Crumble the biscuits into fine crumbs either in a food processor or by placing them in a zip bag and rolling with a heavy jar. Mix with sugar and melted butter until the texture resembles wet sand, then press firmly into the bottom of your prepared springform pan. Bake for ten minutes until fragrant and lightly golden, then set aside to cool while you work on the filling.
- Whip the filling:
- Beat the softened cream cheese and sugar together until completely smooth, scraping the bowl often to catch any stubborn chunks clinging to the sides. Add eggs one at a time, mixing just until each disappears into the batter. Fold in sour cream, flour, vanilla, and lemon zest with gentle strokes, stopping the moment everything is combined because overmixing invites air and air invites cracks.
- Bring it together:
- Pour the filling over your cooled crust and use a spatula to smooth the top. Tap the pan firmly on the counter a few times to coax any trapped air bubbles to the surface, watching them pop like tiny promises.
- The long slow bake:
- Place in your preheated oven at 160 degrees and bake for fifty to sixty minutes, checking near the end. The edges should be set and slightly puffed while the center still has a gentle wobble when you nudge the pan, like gelatin that has not quite made up its mind.
- The patient cool down:
- Turn off the oven, crack the door open, and leave the cheesecake inside for one full hour. This gradual cooling is the single most important step for preventing cracks, so resist the urge to pull it out early.
- Add the optional topping:
- Whisk together sour cream, powdered sugar, and vanilla until smooth, then spread gently over the cooled cheesecake in an even layer. This step is optional but it adds a lovely tangy finish and conveniently covers any surface imperfections.
- The hardest wait:
- Refrigerate for at least six hours or preferably overnight, because the texture transforms completely during the chill. Run a thin knife around the edge before releasing the springform, then slice with a hot clean knife for the neatest portions.
 Save
Save There is something quietly powerful about pulling a cheesecake from the fridge the morning after you made it, knowing you created something that required nothing more than time and trust in the process.
What to Serve Alongside
Fresh berries are the easiest companion, but a drizzle of warm fruit compote or chocolate sauce takes each slice into celebration territory. A glass of Moscato or a cup of strong coffee both work surprisingly well, depending on the mood and the company.
Making It Gluten Free
Swapping the crust to gluten free cookies is straightforward and does not change the character of the dessert at all. Just check the labels on your cookies and your flour substitute, since cross contamination hiding in unexpected places has caught me off guard before.
Getting Ahead of Yourself
This is the ideal make ahead dessert because it actually improves overnight, which makes it perfect for dinner parties where you want to spend time with your guests instead of babysitting the oven. Freeze individual slices wrapped tightly in plastic for up to a month.
- Thaw frozen slices in the refrigerator overnight rather than on the counter for the best texture.
- A warm dry knife dipped in hot water between cuts gives you bakery clean slices every time.
- Always store leftover cheesecake covered in the fridge and consume within five days for the freshest taste.
 Save
Save Every cheesecake teaches you something small, and each one gets a little more confident than the last. Share it generously and keep the recipe close.
Your Recipe Questions Answered
- → Why did my cheesecake crack on top?
-
Cracks usually form from overmixing the batter, which incorporates too much air, or from sudden temperature changes. Beat the filling only until just combined, and always cool the cheesecake gradually inside the turned-off oven with the door slightly ajar.
- → Can I make cheesecake without a springform pan?
-
A springform pan is strongly recommended because it allows you to remove the sides cleanly without flipping the cheesecake. If you only have a regular cake pan, line it with enough parchment overhang to lift the cheesecake out gently after chilling.
- → How long should I chill the cheesecake before serving?
-
Plan for at least six hours, but overnight is ideal. This extended chilling time allows the filling to fully set and develop its signature dense, creamy texture. Cutting into it too early will result in a soft, unstable slice.
- → Can I freeze leftover cheesecake?
-
Yes, cheesecake freezes exceptionally well. Slice it into individual portions, wrap each tightly in plastic wrap, then place in an airtight container or freezer bag. Freeze for up to three months and thaw overnight in the refrigerator before enjoying.
- → How do I get clean slices when cutting cheesecake?
-
Use a sharp knife dipped in hot water and wiped clean between each cut. The warmth helps the blade glide through the dense filling without dragging, giving you neat, bakery-style slices every time.
- → Can I substitute the graham crackers for the crust?
-
Absolutely. Digestive biscuits, chocolate cookies, vanilla wafers, or even gluten-free cookies all work well. The key is crushing them finely and mixing thoroughly with melted butter so the crust holds together when pressed into the pan.
