 Save
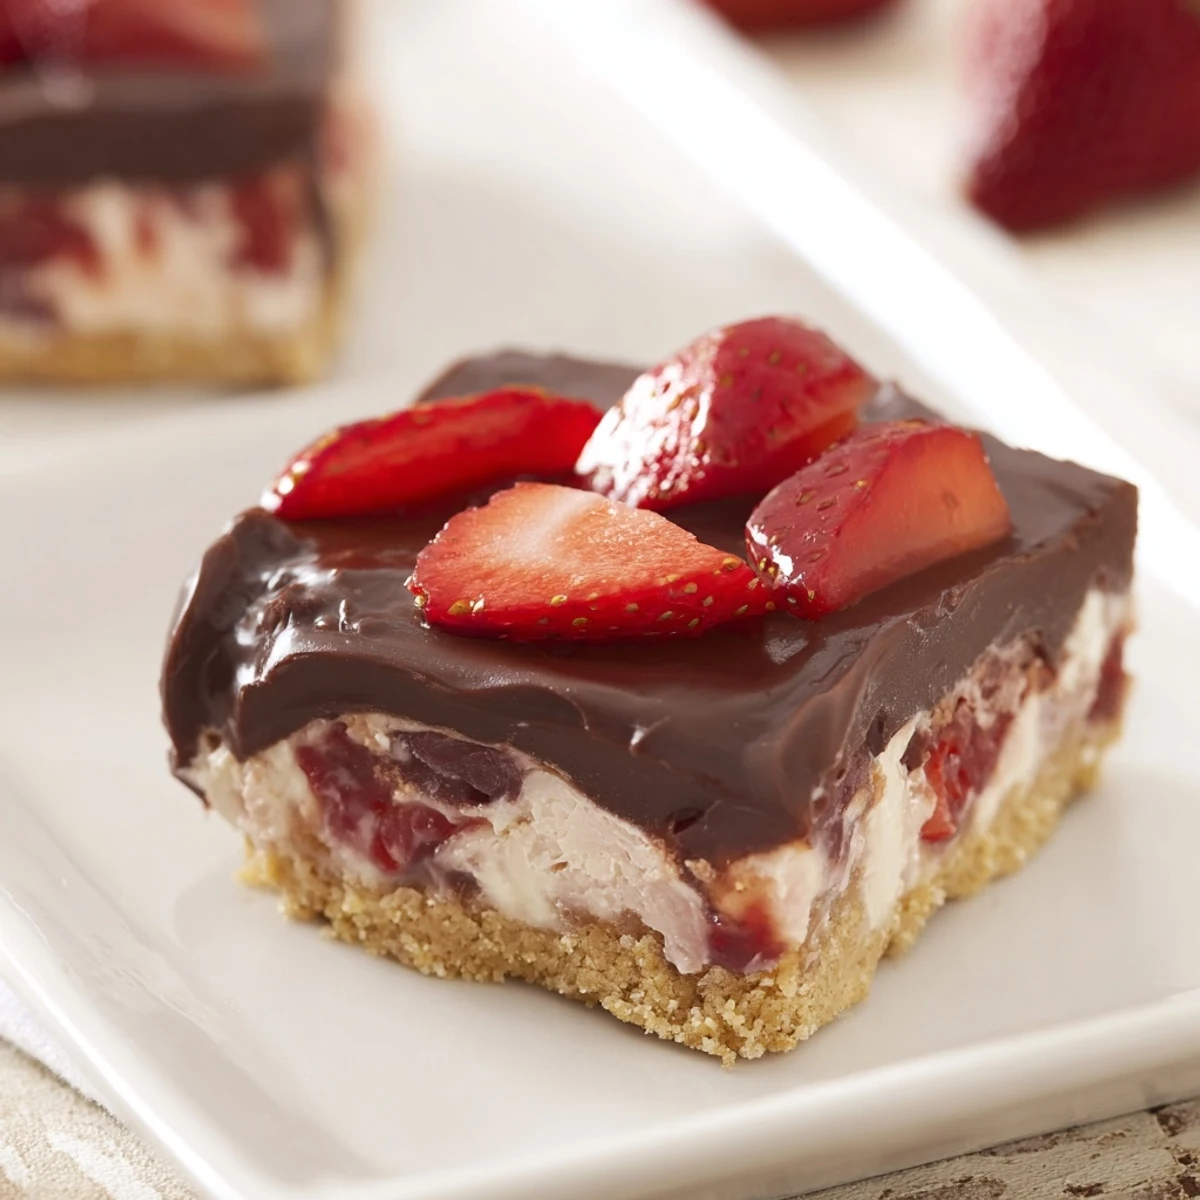
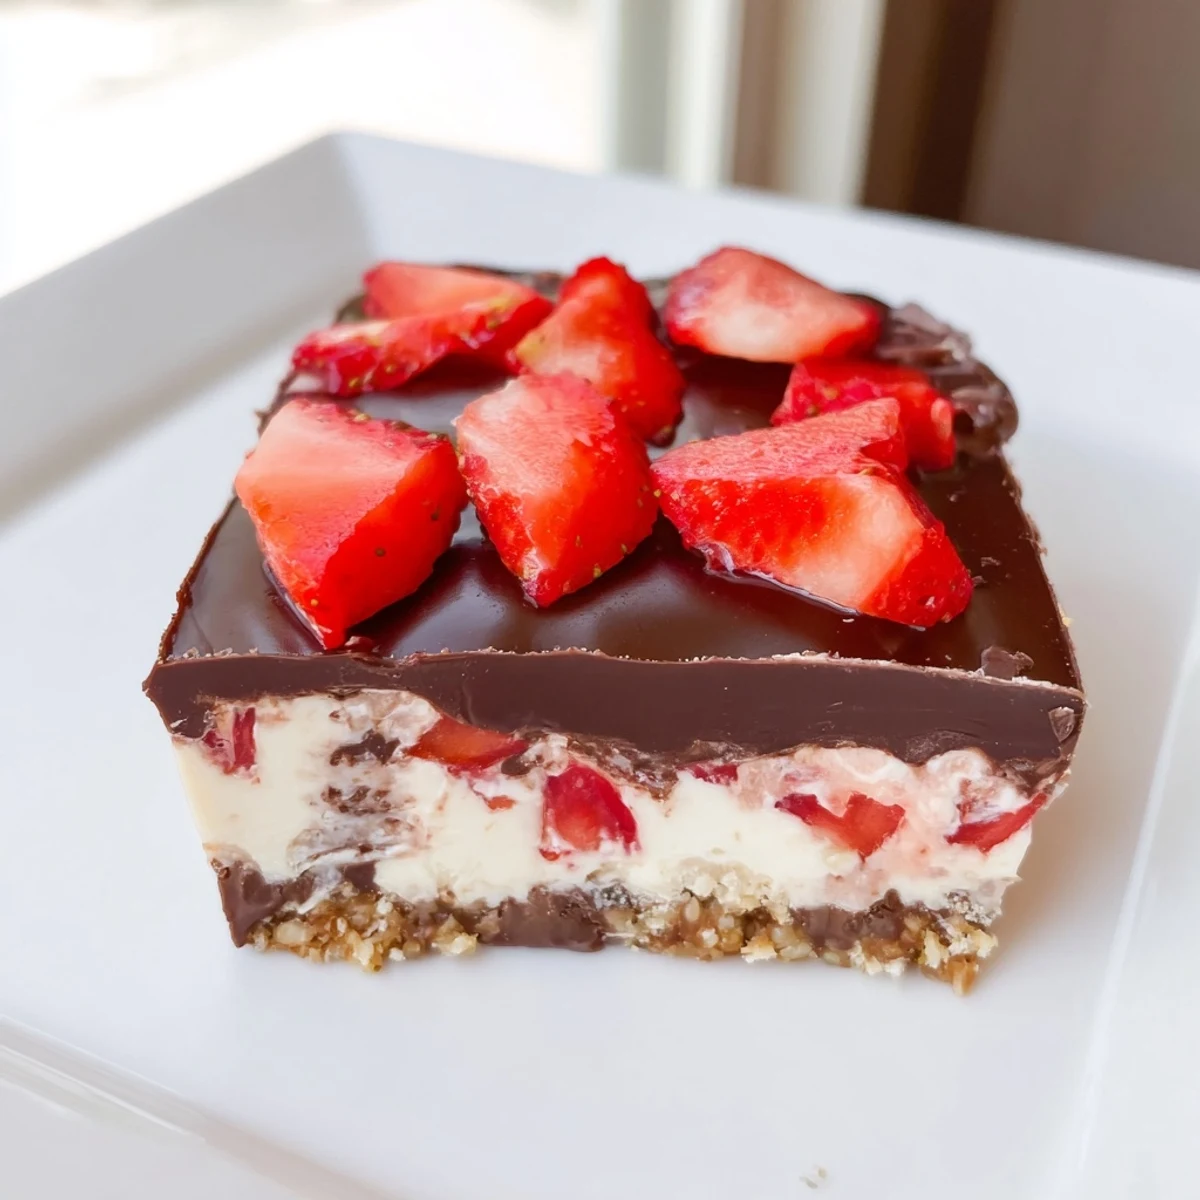
Save These decadent cheesecake bars feature a buttery graham cracker crust topped with a smooth cream cheese layer. A fresh strawberry swirl adds fruity brightness, while a rich chocolate topping completes the indulgent treat. After baking, bars chill for a firm, creamy texture and are garnished with halved strawberries for a fresh finish. Ideal for gatherings, these bars combine classic flavors with an elegant presentation.
The kitchen still smells like warm butter and sugar when I think about the first time I made these bars. My roommate walked in mid-bake and immediately planted herself in front of the oven, watching through the glass door as the cheesecake layer rose. We ended up eating them warm from the pan with forks, chocolate still melted and pooling over the edges, completely abandoning any notion of waiting for them to chill properly.
I brought these to a summer potluck last year and watched them disappear in record time. Someone actually asked for the recipe before they'd even finished their first bite, chocolate still smeared at the corner of their mouth. Now they're my go-to whenever I need to show up with something that says I put in real effort without actually spending my whole weekend in the kitchen.
Ingredients
- Graham cracker crumbs: These form the buttery foundation that holds everything together, so crush them finely but dont turn them into complete dust
- Cream cheese: Absolutely must be room temperature or you'll end up with tiny lumps that no amount of mixing can fix
- Strawberry jam: This does the heavy lifting for fruit flavor, so choose one you'd actually eat on toast
- Semi-sweet chocolate chips: Milk chocolate makes these too sweet, while dark chocolate overwhelms the delicate strawberry flavor
Instructions
- Build your buttery base:
- Press those graham cracker crumbs into your lined pan like your life depends on it, getting into every corner and creating an even layer that won't crumble when you slice later.
- Whip up silky cheesecake batter:
- Beat that cream cheese until it's completely smooth before adding anything else, then incorporate each egg one at a time so they emulsify properly into the mixture.
- Swirl in the strawberry magic:
- Drop spoonfuls of your strawberry mixture all over the cheesecake layer, then drag a toothpick through the dots in a figure-eight pattern for that marbled look.
- Patience through the chilling phase:
- Let these cool completely at room temperature before they hit the fridge, or condensation will form under your chocolate layer and ruin that gorgeous glossy finish.
- Crown with chocolate:
- Melt your chocolate in short bursts, stirring between each, then pour it over the chilled bars and tilt the pan to help it spread into an even layer without marks.
 Save
Save My grandmother always said dessert should make people close their eyes for just a second after that first bite. Watching friends do exactly that with these bars, seeing that moment where the chocolate yields to creamy cheesecake and then hits bright strawberry, that's better than any compliment they could put into words.
Making The Strawberry Swirl
I learned the hard way that adding too much strawberry mixture makes the cheesecake layer weep and turn soggy. Three tablespoons of jam with a cup of fresh berries is the sweet spot, giving you those beautiful red ribbons without compromising the creamy texture underneath.
Getting That Clean Slice
Nothing ruins the presentation faster than dragging your knife through soft chocolate and leaving messy trails. Run your knife under hot water, dry it thoroughly, and make one decisive cut for each bar, wiping and reheating the blade between slices for those picture-perfect edges.
Make-Ahead Magic
These bars actually improve after a night in the fridge, giving the flavors time to meld and the texture to become more firm and sliceable. The crust stays perfectly crisp, the cheesecake becomes silkier, and that chocolate topping sets up beautifully.
- Wrap the whole pan tightly in plastic once completely chilled
- Top with fresh strawberries right before serving or they'll release moisture
- These freeze beautifully for up to a month if you can resist eating them all first
 Save
Save There's something about cutting into these bars and seeing those perfect layers that makes you feel like you actually know what you're doing in the kitchen. Sometimes I make them just for myself, cutting tiny squares off the edge every few hours until they're gone.
Your Recipe Questions Answered
- → How should I prepare the crust?
-
Combine graham cracker crumbs, melted butter, sugar, and salt, then press evenly into a lined pan and bake for 10 minutes before adding layers.
- → Can I substitute the strawberries?
-
Yes, raspberries or blueberries can be used in place of strawberries for a different fruity twist.
- → How long should the bars chill?
-
Chilling for at least 4 hours or until firm is essential to achieve the proper texture and ease of slicing.
- → What is the best way to melt the chocolate topping?
-
Melt chocolate chips and butter together in short microwave bursts, stirring until smooth before spreading over chilled bars.
- → Are these bars suitable for vegetarians?
-
Yes, the ingredients used are vegetarian-friendly, making these bars suitable for a meat-free diet.
