 Save
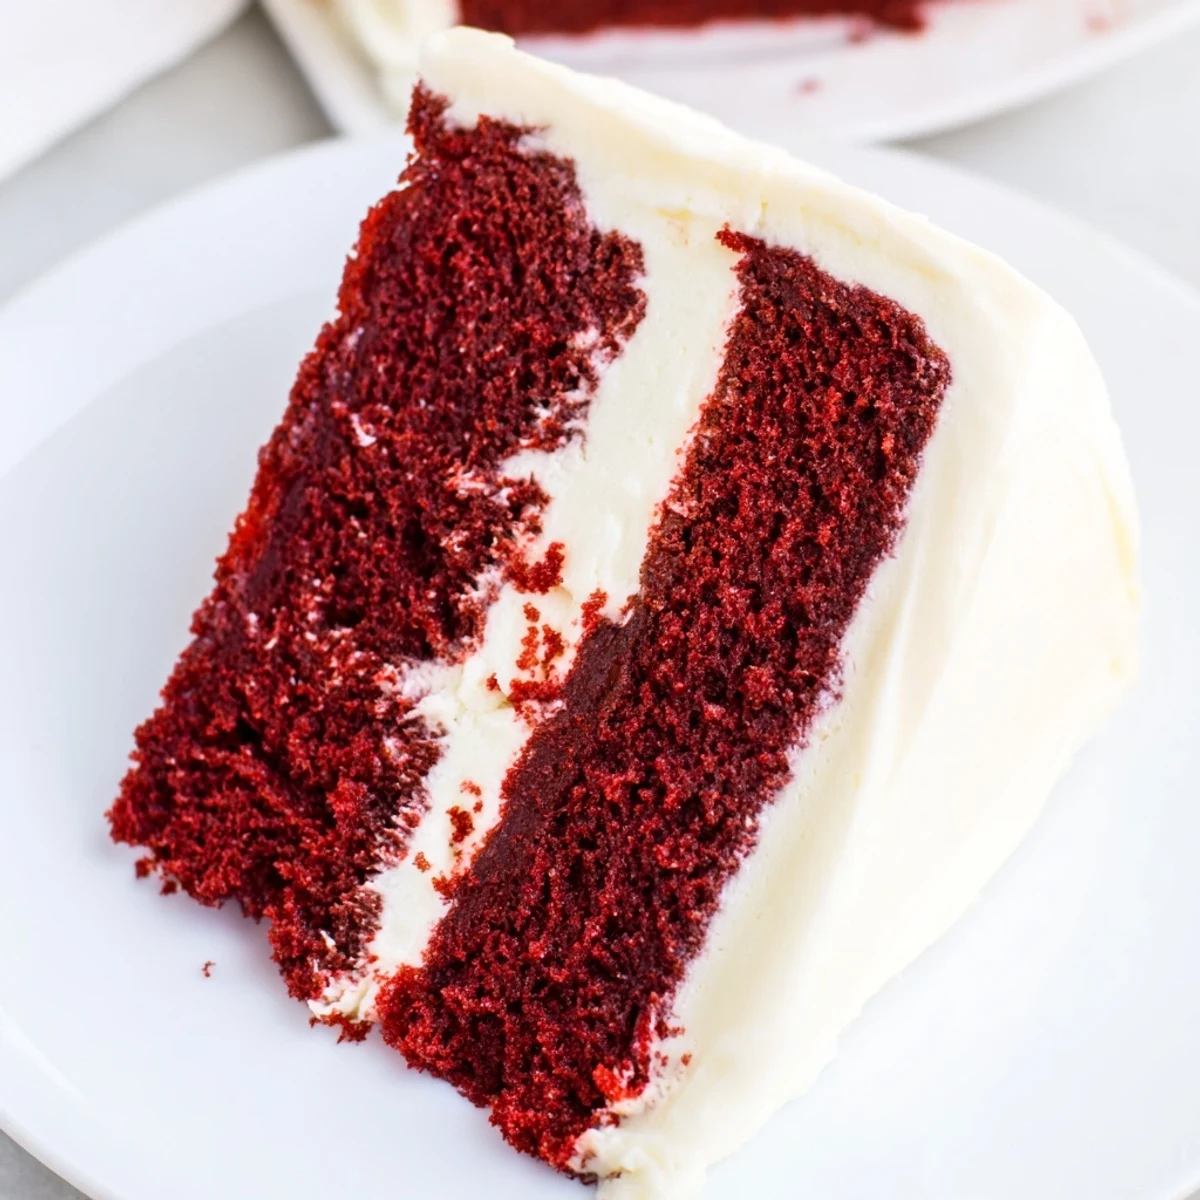
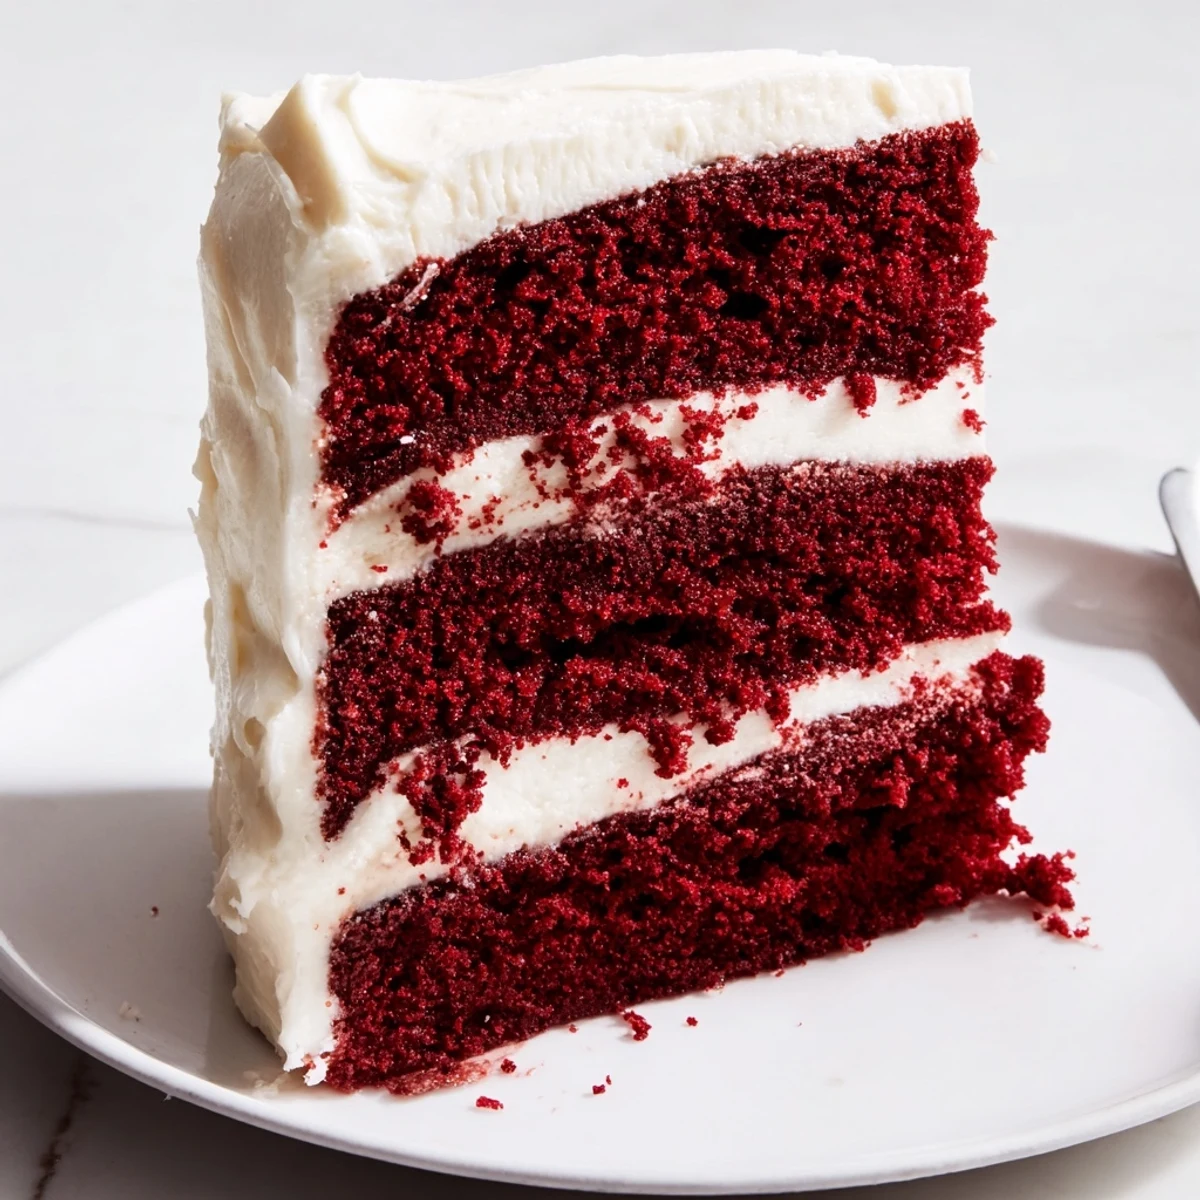
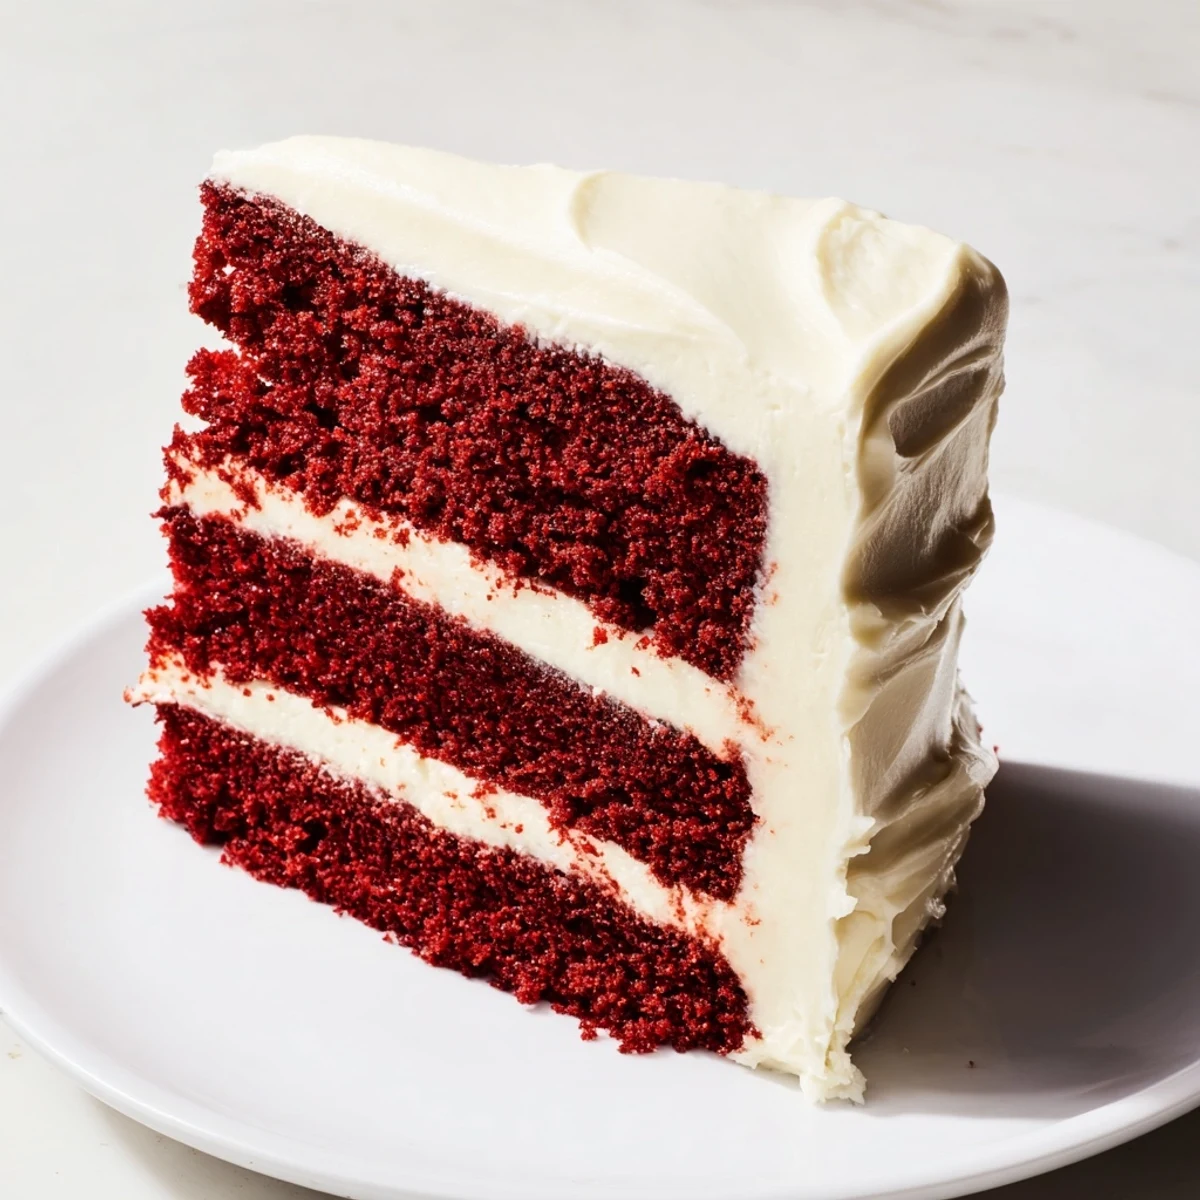
Save This luscious dessert showcases tender, cocoa-infused red layers that bake to perfection and are generously enveloped in a smooth, tangy cream cheese frosting. The balance of rich flavors and creamy texture makes it a standout choice for gatherings or indulgent moments. Preparation involves mixing dry ingredients with wet components including buttermilk and a hint of vanilla, baking until moist, and assembling with a silky frosting made from cream cheese, butter, and powdered sugar. Chilling the final creation ensures clean slices and enhanced flavor.
The first time I made red velvet cake, I was standing in my grandmother's kitchen on a rainy afternoon, watching her pull three perfect crimson layers from the oven. She'd taught me that this cake wasn't just about the dramatic color—it was about that subtle hint of cocoa and the way the tangy cream cheese frosting created this beautiful contrast that made people close their eyes with each bite. I've made it dozens of times since, and it never fails to feel a little bit special.
I remember bringing this cake to a potluck where someone's aunt had made seven other desserts, and people kept coming back to my plate asking for the recipe. It was one of those quiet victories in the kitchen—nothing fancy or complicated, just layers of deep crimson, creamy frosting, and honest, good flavor that reminded everyone why this cake has been a favorite for generations.
Ingredients
- All-purpose flour (2½ cups): The foundation of your cake, and sifting it with the other dry ingredients ensures everything mixes smoothly without lumps.
- Granulated sugar (1½ cups): This sweetens the cake and also helps create a tender crumb when creamed properly with the wet ingredients.
- Baking soda (1 tsp): This reacts with the buttermilk and vinegar to give the cake its signature tender texture and slight tang.
- Fine salt (1 tsp): Don't skip this—it balances the sweetness and makes every flavor pop.
- Unsweetened cocoa powder (1 tbsp): You won't taste chocolate exactly, but this adds depth and that classic red velvet richness.
- Vegetable oil (1½ cups): Oil keeps this cake moist longer than butter would, and it creates a silky crumb.
- Buttermilk (1 cup, room temperature): Room temperature buttermilk mixes evenly and reacts better with the baking soda for lift and tenderness.
- Eggs (2 large, room temperature): Room temperature eggs incorporate more smoothly and create a better structure in your cake.
- Red food coloring (2 tbsp): This is what gives the cake its stunning color; gel coloring works beautifully if you prefer it.
- Vanilla extract (1 tsp): Pure vanilla is worth the investment here—it brings warmth to every bite.
- White vinegar (1 tsp): This reacts with the baking soda to create lift and adds a subtle tang that makes the cake taste more complex.
- Cream cheese (16 oz, softened): The star of the frosting—softened cream cheese beats to a smooth, cloud-like consistency that holds its shape.
- Unsalted butter (½ cup, softened): Butter adds richness to the frosting and helps it freeze without becoming rock-hard.
- Powdered sugar (4 cups, sifted): Sifting removes lumps so your frosting is silky smooth.
- Vanilla extract (2 tsp for frosting): Use the same quality vanilla here—it makes the frosting taste like a memory of home.
- Salt (pinch): A tiny pinch enhances the creaminess and cuts through the richness.
Instructions
- Prepare your pans:
- Preheat your oven to 350°F and grease three 8-inch round cake pans thoroughly, then dust them with flour so the cake slides out perfectly. Getting this step right means the difference between a cake that releases smoothly and one that sticks stubbornly to the sides.
- Mix the dry ingredients:
- Sift together the flour, sugar, baking soda, salt, and cocoa powder into a large bowl, making sure everything is evenly combined. This sifting step aerates the flour and prevents lumpy streaks in your final cake.
- Combine the wet ingredients:
- In another bowl, whisk together the oil, buttermilk, eggs, food coloring, vanilla, and vinegar until the mixture is smooth and vibrant red. The food coloring will streak at first, but whisking brings it all to that beautiful even crimson.
- Bring it together gently:
- Gradually add the wet mixture to the dry ingredients, stirring just until smooth—don't overmix or your cake will be tough. This is where patience pays off; a few streaks of flour are better than an overworked batter.
- Divide and bake:
- Divide the batter evenly among the three pans and slide them into the oven for 25 to 30 minutes, until a toothpick inserted in the center comes out clean. The cakes should spring back when you lightly press the top.
- Cool with care:
- Let the cakes cool in their pans for 10 minutes—this prevents them from breaking apart—then turn them out onto wire racks to cool completely. This step requires patience, but rushing it can lead to sad, crumbly layers.
- Make the frosting:
- Beat the softened cream cheese and butter together until creamy, then gradually add the sifted powdered sugar while continuing to beat until fluffy and light. The mixture will go from grainy to cloud-like, and that's exactly what you want.
- Layer and frost:
- Place one cooled cake layer on your serving plate, spread a generous layer of frosting on top, then repeat with the remaining layers. Frost the sides and top, working the spatula smoothly for a polished look, then chill for 30 minutes before slicing.
 Save
Save There's something magical about the moment when you frost the first layer—when that creamy, tangy frosting meets the soft, rich cake crumb and you know you're about to create something that will make people smile. That's when this cake stopped being just dessert and became part of the moments that matter.
The Story Behind Red Velvet
Red velvet became famous in the 1920s, when it was a sign of luxury and careful attention to detail. What I love about making it now is that it feels both vintage and completely timeless—like you're connecting to a hundred years of celebrations and kitchen moments. It's one of those recipes that reminds you why certain desserts stick around.
Making It Your Own
Once you've made this cake a few times, you'll find your own touches—maybe a half teaspoon of almond extract in the batter, or a scatter of fresh berries on top, or chocolate shavings for drama. The recipe is solid enough to be your canvas, not your cage.
A Cake That Keeps
One of my favorite things about red velvet is that it actually gets better the next day, when the flavors have time to settle and the layers have absorbed just enough moisture from the frosting to taste like silk. You can bake the layers a full day ahead, wrap them tightly, and frost them fresh whenever you're ready.
- Wrapped tightly in plastic wrap, the cooled cake layers stay fresh for up to 24 hours.
- The frosted cake keeps beautifully in the refrigerator for three days and tastes wonderful cold or at room temperature.
- You can even freeze the unfrosted layers for up to a month—just thaw them completely before frosting and serving.
 Save
Save This cake has a way of becoming someone's favorite memory, the one they ask you to make for their birthday or bring to the dinner they want to feel special. That's the real magic of red velvet.
Your Recipe Questions Answered
- → What gives the cake its red color?
-
The vibrant red hue comes from red food coloring added to the batter, creating its signature look.
- → Can I make this dessert ahead of time?
-
Yes, the layers can be baked a day prior and stored wrapped tightly to maintain freshness before frosting.
- → How is the cream cheese frosting prepared?
-
Softened cream cheese and butter are beaten together until smooth, then powdered sugar, vanilla, and a pinch of salt are mixed in until fluffy.
- → What texture should I expect from the baked layers?
-
The layers are moist and tender with a subtle cocoa flavor, offering a soft crumb that pairs well with the creamy frosting.
- → Are there any suggested garnishes for serving?
-
Fresh berries or chocolate shavings make attractive and delicious garnishes to complement the layers and frosting.
